Skip to Main Content

Research Impact

Overview

This is a step-by-step guide on how to generate a citation report from Scopus.

Please note that a Scopus citation report is not required for NTU's Promotion and Tenure (PT). 

If you need any help in generating a Scopus citation report yourself, please do not hesitate to contact us.

3 Simple Steps to Generate your Scopus Citation Report

  1. Click here to access Scopus.
  2. Register or sign in to your Scopus account using your NTU e-mail address.
    Note: Signing in is required to merge your author profiles and to save your search results to document lists.
  3. Search for your publications in Scopus by going to 'Authors'.
  4. If you already have an existing ORCID iD which is correctly associated with your publications, select 'ORCID' from the drop-down list and search using your ORCID iD.
  5. If not, at the default 'author name' field, enter your last and first name, and click the 'Search' button. 
     
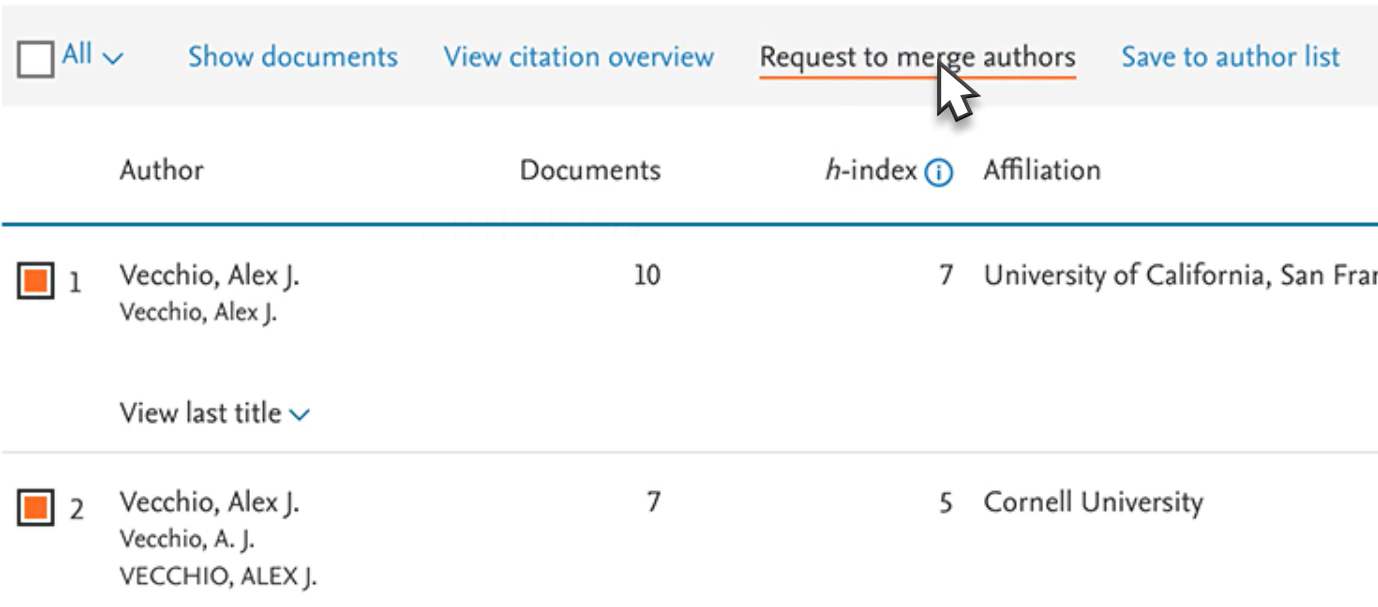
  6. At Author Results, select the author profile(s) (red box below). If more than one author profile is found, select those that belong to you.
    Note: You may 'request to merge authors'. However, corrections to author profile can only be made by authors themselves, and updates to profile may require several days to more than a week.

Click 'Show documents' (green box below) to review the publication list associated with the selected author profile(s).


Preparing a Document Saved List

1. At 'Document Type' (red box) on the left sidebar, ensure that the documents are of the type articles, review articles, proceeding papers, book chapters, early access. Do not include erratum/correction(s), meeting abstracts, editorial materials, letters and author’s replies. (This is to ensure alignment with the guidelines provided by the NTU Promotion and Tenure Review Committee.) 

For example, to remove 'Editorial' from your publication list, select 'Editorial' and click 'Exclude' (green box below) at the bottom of the side bar.


2. To save all your publications into a document list, select the checkbox 'All' (red box below) and click 'Save to list' (green box below).


Enter a name for the list, preferably in the format: Name_YYYYMMDD, and click 'Save list' on the bottom right.


Accessing the Document Saved List

3.  To access the document saved list, click the logo on the top right (red box) and click 'Saved lists' (green box).

"

The document saved list will appear as shown below. Click the document saved list to display the list of publications.


Removing a publication (document) from the Document Saved List

4. To remove a document from the Saved List, tick the checkbox next to the document title and click 'Delete' (green box below). The 'Document Results' page refreshes showing that the document has been removed.


Adding a publication (document) to the Document Saved List

5. To add a missing publication, click the 'Search' on the top right (red box).


Search in the 'Documents' field (green box below).


6. From the 'Document Results' page, select the desired publication and click 'Save to list' (green box).


Exporting the Saved List (Publication List) with detailed citation information (Optional)

1. Retrieve your publications from your Saved List as per instructions under 'Accessing the Document Saved List' of Step 2.

2. Make sure the Saved List is correct and up-to-date.  

3. Select 'All' publications (red box) and click 'CSV export' (green box). Note: Select the default settings (i.e. CSV/excel).


Printing the Citation Overview in PDF format

4. From Saved List, select 'All' publications, click the three horizontal dots (green box) and select 'View citation overview' (red box).


5. Sort publications by 'Citation count (descending)'.


6. Save the print out in PDF format in portrait layout. Ensure headers/footers and background graphics are checked.


Exporting the Citation Overview in CSV format 

7. Click 'Export' (red box below) located on the right. The Citation Overview will be exported to CSV format.