Before depositing:
- Please ensure that you have all the necessary copyright permissions to make the data available on DR-NTU (Data).
- Please check that all collaborators and relevant parties have agreed to sharing data publicly via DR-NTU (Data).
By depositing:
- You declare that the dataset complies with the General Terms of Use and NTU Data Governance Policy.
- You grant DR-NTU (Data) all necessary permissions and required licenses to make the Content you submit or deposit available for archiving, preservation and access, within the Site.
- You grant DR-NTU (Data) the right to make changes, if necessary, to Metadata, including enhancements and/or corrections.
Create a dataset:
Enter basic information, upload data files, and obtain a DataCite DOI for your unpublished dataset.
- At the top right of dataverse page, click “Add Data” > “New Dataset”.
- Enter all the required fields (Note: mouse over question icon for hints):
- Title: Enter a title for your dataset. If your dataset is for a publication:
- Use “Replication Data for” prefix followed by publication’s title when you are uploading the full set of data, code, scripts and documentation that facilitates others to replicate your study to derive the same findings. (See LibFAQ).
- Use “Related Data for” prefix followed by publication’s title when you are sharing less than what is needed for others to replicate your study.
- Author: Add name(s) and affiliation(s) of author(s) or data producer(s), and associated ORCID(s) under Identifier Scheme, e.g. XXXX-XXXX-XXXX-XXXX
- Contact: By default, it will be dataset creator’s contact; edit if necessary
- Description: A brief summary of purpose, nature and scope of dataset

- Subject: Select relevant subject categories from dropdown list
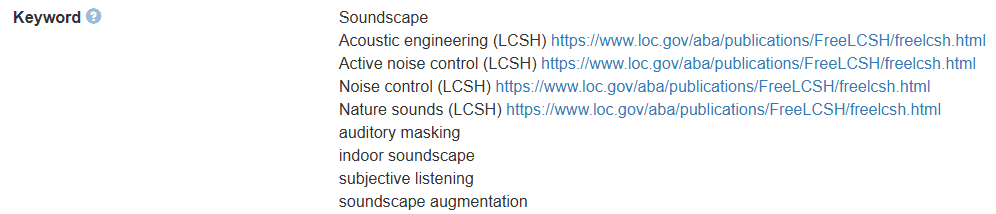
- Keyword: Enter key terms relevant to dataset to aid search and retrieval. Enter the keywords one by one using the "+" button on the right.
- Kind of data: Enter type of data, e.g. textual data, survey data, experimental data, program source code, etc.
- Software: Enter name and version of software used to generate the data files or should be used to open the data files. If you use a self-created software, upload a copy of the software, if possible.
Upload files:
- Scroll down to the “Files” section and click “Select Files to Add”. You can drag and drop data files from your folders or select multiple files directly into the upload widget. If your data files are in Dropbox, you may sign into your Dropbox account to upload files directly from there.
- Please note the following upload limits: (See LibFAQ.)
- Limit of 1,000 files in a zipped file deposit.
- Each single file upload is limited to 10 GB*.
* If your individual data file exceeds 10 GB and can’t be compressed, please contact NTU Data Librarians for assistance.
- You may edit the names and file paths for each file if necessary.
- You are strongly recommended to add description and tags (i.e. Documentation, Data, Code) (via Edit > Tags) for each file. Adding tags to your data files helps others to differentiate which files are data, documentation or code.
- Click “Save Dataset”.
- Your unpublished draft dataset is now created and minted with a DOI. If this dataset is associated with an upcoming publication, please include a ‘Data Availability Statement’ in your publication with a DOI link to your dataset (See how to do that).
- If you are awaiting publication and need to embargo specific files, you can set the embargo prior to publishing the dataset (See how to do that).
Once a dataset is published, all its data files will be publicly searchable, viewable and accessible. You can NOT unpublish a published dataset. If any of your deposited data files contain potentially sensitive, confidential or proprietary information, please refrain from publishing. Should you need a second opinion or review, contact NTU Data Librarians.
Add additional dataset details:
Once you have created a draft dataset, we recommend that you enter more information about the dataset. This will increase the chance of others being able to discover your data, and to interpret and reuse it correctly.
- At the top right of dataset page, click “Edit” > "Metadata"
- Enter the following recommended fields (Note: mouse over question icon for hints):
- Related Publication (If applicable): Add the citation, complete with the URL and/or DOI, of the publication. Note: If your dataset is for an upcoming publication, you may leave this field blank for now and return to add the citation upon acceptance.
- Grant Information (Recommended): Add grant agency name(s) and grant number(s), if applicable.
- Related Datasets (If applicable): If you have already deposited a portion of your dataset elsewhere, enter the full reference, including persistent identifier (e.g. DOI).
- Data Sources (If applicable): If you did not generate or collect the data yourself, enter the information of the data sources, e.g. an archive, a corpus, or a website from which you obtained the data.
- Notes (If applicable): For thesis, dissertation and FYP dataset, add Supervisor’s name.
Review usage license:
The default license for your dataset is Creative Commons license CC:BY:NC. This license indicates that others may reuse the data for non-commercial applications only, and must correctly attribute your dataset.
If you need to adopt a different license:
- At dataset page, go to “Terms” tab and click “Edit Terms Requirements” on the right.
- Under Dataset Terms, select the appropriate license. If you don't wish to use any of the licenses, click on 'Custom Dataset Terms'.
- If you chose 'Custom Dataset Terms', enter the custom 'Terms of Use' as required. Alternatively, you may upload the terms of use in a license file as an attachment.
Restrict access (If applicable):
Once a dataset is published, all its data files will be publicly searchable, viewable and accessible. You can NOT unpublish a published dataset. If any of your deposited data files contain potentially sensitive, confidential or proprietary information, please refrain from publishing. If you have de-sensitised your data, we may still ask you to restrict access to your data file(s). Should you need a second opinion or review, contact NTU Data Librarians.
If you need to restrict access to your file(s):
- At dataset page, go to “Files” tab, and select the file(s) that you need to restrict.
- Click “Edit Files” > “Restrict”.
- At the pop-up box, enter Terms of Access for the data, i.e. information on how and if users can gain access to the restricted files in your dataset. Alternatively, you may edit the Terms tab or select Terms in the “Edit” dropdown button in the dataset. Scroll down to “Restricted Files + Terms of Access”.
- You may allow users to request access for your restricted file(s) by selecting “Enable access request”. A “Request Access” icon will appear next to the file(s). You will be notified when there are such requests, and you can then decide to grant access, or ask user to elaborate his/her purpose. If you don’t enable access request, users will have to contact you or whoever specified in the “Contact” field.
- Click “Save Changes”.
- In case you are leaving the University, add additional email contact or appoint a custodian to manage access request.
Set file embargoes (If applicable):
If you wish to time the release of your dataset's data files, you can apply an embargo (see LibFAQ on how).
Share unpublished dataset (Optional):
Even though unpublished datasets are minted with a DataCite DOI, they are not publicly searchable or viewable yet. To share your unpublished dataset (e.g. with journal reviewer):
- Create a private URL. At your dataset, click “Edit” > “Private URL” > “Create Private URL” or "Create URL for Anonymized Access" (see what's the difference).
- You can disable the private URL by going to your dataset, click “Edit” > “Private URL” > “Disable Private URL”. Note: private URLs will become invalid once the dataset is published.
Manage permissions (Optional):
To collaborate on a dataverse or dataset, the dataset ‘Admin’ may grant permissions to other users (see LibFAQ on how). The user must have logged in at least once, in order to be added.


